The Best Monster Cookies Recipe: Thick, Chewy & Easy to Make!
Ever wondered what happens when a peanut butter cookie and an oatmeal cookie have a giant, colorful party? You get monster cookies! These treats are famous for being big, chewy, and packed with everything but the kitchen sink. Whether you are baking for a school bake sale or just a cozy night in, these cookies are a guaranteed crowd-pleaser.
In this guide, we will dive into why these cookies are so special. We will look at their funny history, the best ingredients to use, and how to get that perfect “monster” texture every time. Grab your apron, and let’s get started!
What Exactly Are Monster Cookies
A monster cookie is like the “Frankenstein” of the dessert world. It takes the best parts of different cookies and mashes them into one. You get the salty kick of peanut butter, the hearty bite of oatmeal, and the sweet crunch of M&Ms and chocolate chips.
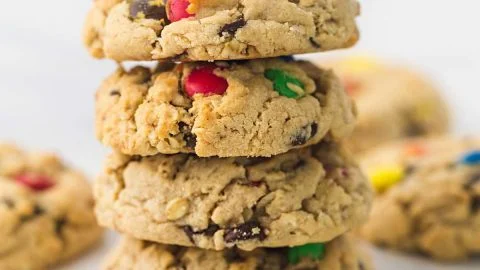
Unlike a standard chocolate chip cookie, these are usually made much larger. They are thick and dense, which is why they earned the name “monster.” Some recipes even leave out the flour entirely, relying on rolled oats to hold everything together. This makes them naturally hearty and very filling!
The History of the Monster Cookie
The story of monster cookies is actually quite funny. It all started in 1971 with a man named Dick Wesley. He was a photographer who loved to bake. One day, he wanted to make cookies but didn’t have enough flour. Instead of giving up, he used quick oats and a massive amount of other ingredients.
The original batch was so big it supposedly burnt out two home mixers! He used 12 eggs and 18 cups of oatmeal. Because the recipe was such an “untamable beast,” it became known as the monster cookie. Since then, families have scaled it down, but the “more is more” spirit remains.
Why Everyone Loves This Recipe
There is something magical about the combination of flavors in monster cookies. The creamy peanut butter acts as a rich base that balances out the sugar. When you add semi-sweet chocolate chips, you get those classic melty puddles that everyone craves.
People also love how customizable they are. You can use different colored candies for holidays, like red and green for Christmas or orange and black for Halloween. It’s a “people-first” recipe because it’s designed to be shared and enjoyed by kids and adults alike.
Essential Ingredients for the Perfect Batch
To make the best monster cookies, you need high-quality staples. Most recipes use unsalted butter and a mix of granulated sugar and light brown sugar. The brown sugar is the secret to that “chewy” texture we all love.
Don’t forget the pure vanilla extract and a pinch of kosher salt. These might seem small, but they make the chocolate and peanut butter flavors pop. For the “bulk,” you’ll need all-purpose flour (though some go flourless) and plenty of old-fashioned oats.
Choosing the Right Peanut Butter
When baking monster cookies, the type of peanut butter matters a lot. Most experts suggest using “no-stir” processed brands like Jif or Skippy. These brands stay stable in the oven and help the cookies keep their shape.
While natural peanut butter is great for toast, it can be tricky for baking. It often separates, which might make your cookies greasy or crumbly. If you want a bit of extra texture, you can even swap in chunky peanut butter for an added nutty crunch!
Oats: Quick vs. Old-Fashioned
The texture of your monster cookies depends heavily on your oats. Rolled oats (old-fashioned) give the cookies a rustic, hearty chew that stands up well to the heavy mix-ins. They make the cookie feel substantial.
If you prefer a softer, more uniform cookie, quick-cooking oats are the way to go. They act more like a binder. Some bakers even use a mix of both to get the best of both worlds! Just make sure not to use “instant” oatmeal packets, as they are too fine and often have added flavors.
Step-by-Step Guide to Making Monster Cookies
- Cream the Fats: Beat your butter and peanut butter with both sugars until the mixture is light and fluffy. This usually takes about 3 minutes.
- Add Liquid Ingredients: Mix in your eggs one at a time, then add the vanilla.
- Combine Dry Ingredients: Slowly stir in your flour, baking soda, and salt.
- Fold in the Goods: This is the best part! Use a spatula to fold in the oats, M&Ms, and chocolate chips by hand.
- Scoop and Bake: Use a large scoop to place dough balls on a baking sheet lined with parchment paper.
- The Cooling Rule: Let them sit on the hot pan for 5–10 minutes after baking. This helps them set so they don’t break when you pick them up.
Expert Tips for Thick and Chewy Results
If you want your monster cookies to look like they came from a professional bakery, try these tricks. First, slightly under-bake them. The edges should be golden, but the centers should still look a little soft. They will firm up as they cool on the wire rack.
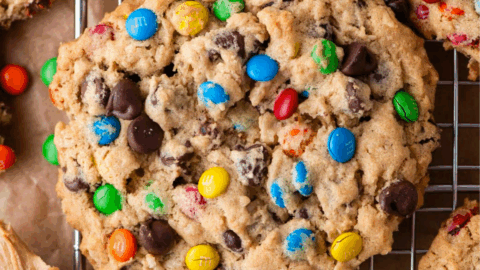
Second, try “topping” your cookies. Before putting them in the oven, press a few extra M&Ms and chips into the top of each dough ball. This ensures the colorful candies are visible and don’t get buried inside the dough.
Fun Variations to Try at Home
The beauty of monster cookies is that they are never boring. You can stir in butterscotch chips, white chocolate chips, or even peanut butter chips for a triple-threat of flavor. Some people love adding chopped pretzels or potato chips for a salty-sweet “kitchen sink” vibe.
If you have a nut allergy in the family, you can even try using sunflower seed butter. While the flavor will change slightly, it still provides that creamy fat needed to keep the cookies moist and delicious.
How to Store and Freeze Your Treats
Monster cookies stay fresh for a long time thanks to the peanut butter and oats. Store them in an airtight container at room temperature for up to 5 days. If you want them to taste “oven-fresh,” just pop one in the microwave for 10 seconds!
These also freeze beautifully. You can freeze the baked cookies for up to 3 months. Or, freeze the raw dough balls! When you’re ready for a snack, just bake the frozen dough for an extra 2 minutes. It’s the perfect way to have a “monster” treat whenever the craving hits.
Frequently Asked Questions (FAQs)
1. Why are they called monster cookies? They are called monster cookies because they are a “monster” of a treat! They are huge, packed with many different ingredients, and were originally made in giant batches that could break a mixer.
2. Can I make these gluten-free? Yes! Many monster cookies are naturally flourless. Just ensure your oats are certified gluten-free. The eggs and peanut butter provide enough structure to keep them together.
3. Do I need to chill the dough? Usually, no! Because of the high peanut butter content, the dough is quite sturdy. However, if your kitchen is very hot and the dough feels sticky, chilling it for 30 minutes can help prevent too much spreading.
4. Can I use raisins instead of M&Ms? You certainly can! While M&Ms are traditional, raisins go great with the oatmeal base. You could even do a mix of raisins and walnuts for a more “grown-up” version.
5. My cookies came out flat. What happened? This often happens if the butter was too melted or if you used natural peanut butter. Make sure your butter is “room temperature” (pliable but still cool) and use a standard creamy peanut butter.
6. What is the best way to scoop the dough? Since these are “monsters,” use a large 2-ounce cookie scoop or a 1/4 cup measuring cup. This gives you that classic jumbo size.
Conclusion
Making monster cookies is a fun way to bring some color and excitement into your kitchen. They are thick, chewy, and satisfy every sweet tooth with their mix of peanut butter and chocolate. Whether you follow the traditional recipe or add your own “kitchen sink” twist, these cookies are sure to be a hit.